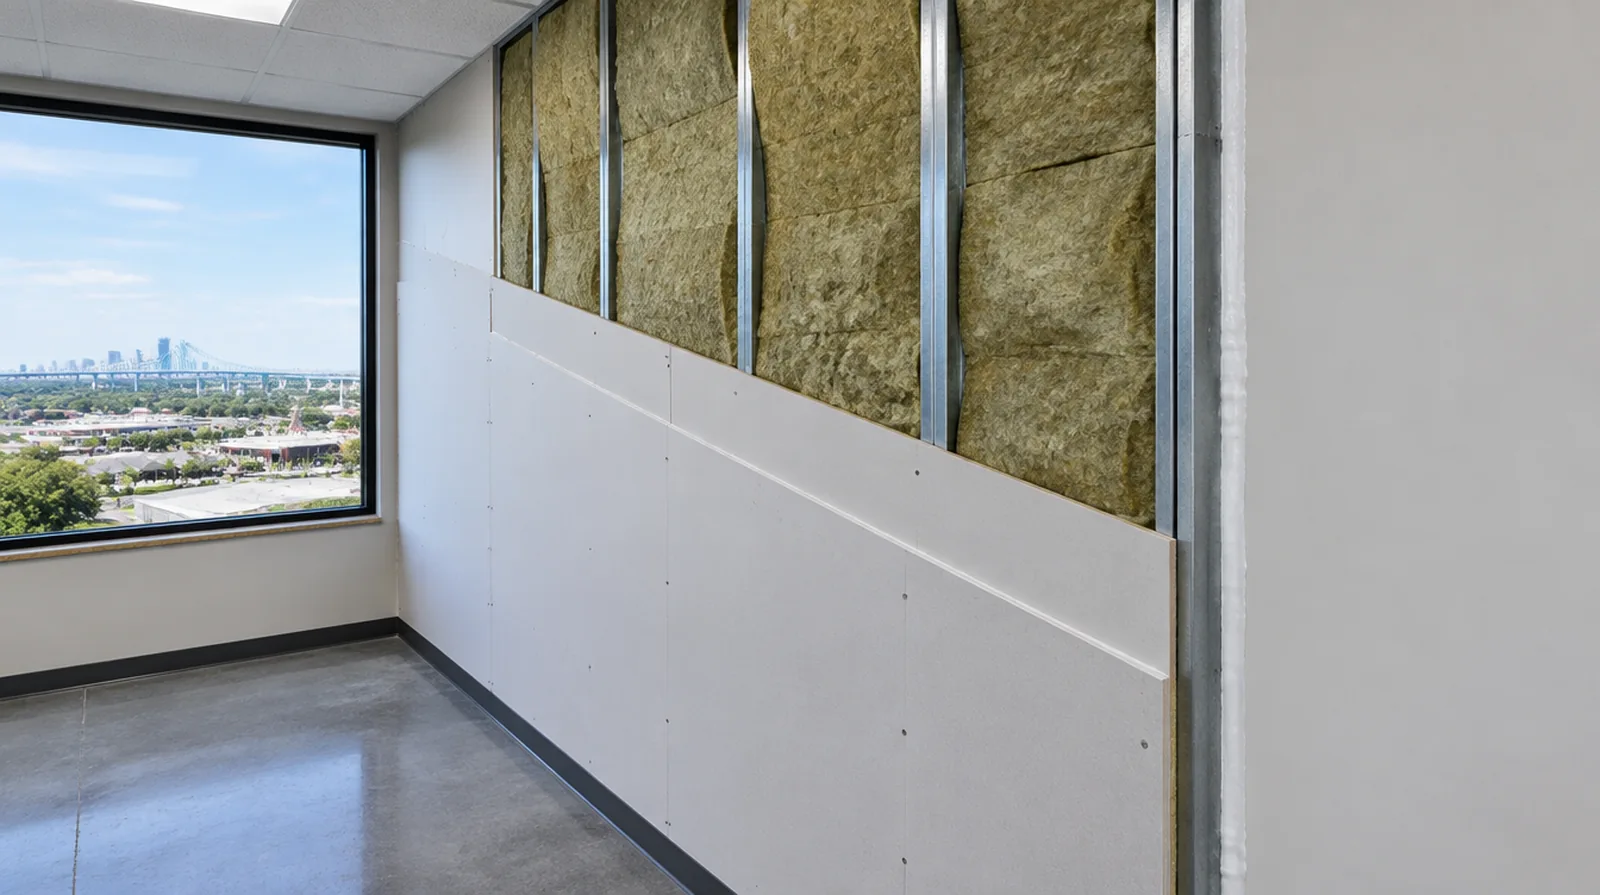
Identify the noise path
Determine whether the main concern is airborne speech or vibration through the building structure. A useful assessment starts with the type of sound and the path it follows. When the decorative coating has been selected, tell the finisher its intended sheen and color while the preparation of the surface standard is still being agreed.
Evaluate added thickness
Adding layers changes the relationship between the wall surface face, fittings and adjoining trim. Include those interfaces in the scope so acoustic work does not leave unfinished perimeter details. If a room has only limited ventilation, discuss how the finishing materials can dry without disrupting comfort or spreading dust elsewhere.
Address air leakage
Small gaps around edges and service penetrations can undermine an otherwise substantial wall. Include compatible sealing wherever it is required by the chosen sound control assembly. If the wall work belongs to a broader renovation, coordinate its order with flooring, cabinetry and trim instead of scheduling finishing in isolation.
Finish the visible surface
The room side of an acoustic installation still needs appropriate taping, finishing and coating preparation. Complete that work without disturbing the details on which the sound control system depends. When panel replacement exposes a cavity, resolve any required inspection before that opening is closed and the finishing work begins.
Avoid rigid bridges
Resilient components can lose effectiveness when fasteners or fittings create unintended solid connections. Check fastener and attachment details against the system guidance instead of judging only the noticeable wall. When panel replacement exposes a cavity, resolve any required inspection before that opening is closed and the finishing work begins.
Coordinate electrical boxes
Opposing outlets and unsealed openings may create weak points in a separating wall. Electrical changes ought to be planned with the suitable trade and within the required assembly details. If the completion date matters most, allow for intervals between coats as well as active labor rather than assuming the entire process happens continuously.
Review the whole assembly
Board layers, framing, insulation and edge details all contribute to acoustic behavior. Select a suitable tested or documented wall system rather than combining unrelated marketing specifications. For a tightly furnished room, plan temporary storage and the minimum working clearance before material is carried into the property.
Explain verification limits
A construction proposal is not the same as a field measured acoustic performance report. If a particular rating is required, discuss suitable design input and testing with an acoustic professional. For work spread across differing planes, record their dimensions separately and describe the boundary of the treatment on each surface.

Include flanking paths
Noise can bypass a treated partition through connected walls, ceilings and floors. Review those flanking routes when explaining why a single wall treatment may provide only part of the solution. When building management controls access, agree delivery hours and common area protection before committing to a start or finish date.
Respect fire requirements
Acoustic changes should preserve any fire resistance required of the original separating assembly. Confirm compatible materials and details before adding layers or modifying the cavity. If occupancy must resume on a certain day, include the later primer and paint stages in the timetable as well as drywall installation and finishing.
Project context in Metairie
A ceiling repaint may need to extend beyond the patch if the existing coating has aged or cannot be matched consistently. Once the assembly is ready, inspect the proposed blend from the room entry and near the window.
Scope questions before finishing
If the wall work belongs to a broader renovation, coordinate its order with flooring, cabinetry and trim rather than scheduling finishing in isolation.
If the interior will remain occupied, identify a workable separation between the work area and the space that still needs daily access.
If the problem developed after another renovation, explain which nearby materials or building systems changed before the damage became visible.
If the surface condition is uncertain, allow for an assessment that can distinguish stable material from layers that should not be covered.
For a limited patch requiring substantial setup, assess the complete package of access and protection rather than relating cost only to the opening size.
For a tightly furnished room, plan temporary storage and the minimum working clearance before material is carried into the property.
Where light reflects along the wall, inspect the complete plane instead of limiting the review to the edge immediately next to the repaired section.
When a paint contractor follows the drywall work, define the surface condition being handed over and decide who handles any minor final touch ups.
For work spread across differing planes, record their dimensions separately and describe the boundary of the treatment on each surface.
In a room with little free floor space, identify temporary storage for belongings and establish enough clearance for the work before delivery.
When the work area includes a doorway, check the clearance for panel movement as well as the amount of space available for finishing tools.
When a wall has repeated defects, keep a record of earlier repair attempts so a new assessment does not simply repeat an unsuccessful approach.
Explore the Metairie drywall overview for related options, or read the project planning information before arranging the next stage.
More planning details for Metairie
In Metairie, an old ceiling water mark should prompt a straightforward history check before any surface is covered. Record what caused it, what was done to stop the source and whether the mark has changed since then. A dry stain and softened gypsum need different decisions, and a coating cannot stand in for necessary material replacement.